今までOllamaのフロントページを手作業で作っていましたが、WebUIが評判ですのでさっそく使ってみました。
Dockerを使うとあまりにも簡単に実行できてしまうので、あえてDockerを使用しないで環境を構築します。
環境
Windows11Home
Python 3.13(pip) → Python 3.11.9(pip)
ollama 0.4.0
# 環境の確認
c:\data>python -V
# 成功
Python 3.13

# 失敗?
Python ___
# バージョンが表示されない時は違ったPythonインスタンスを参照している可能性があります
# PATHを確認してください

c:\data>pip -V
# 成功
pip -V
pip 24.0 from C:\Users\keiai\AppData\Local\Programs\Python\Python311\Lib\site-packages\pip (python 3.11)

c:\data>ollama -v
ollama version is 0.4.0
構築方法
いきなり挫折(webUI が python3.13に対応していない)
いつも通り公式ドキュメント(Open WebUI Doc)で流れを確認しながらインストールします。
コマンドプロンプトから、次のコマンドでWebUIをインストールしました。
c:\ > pip install open-webuiインストールしたところ、次のような状態になり、インストールできません。
C:\ > pip install open-webui
ERROR: Ignored the following versions that require a different python version: 0.1.124 Requires-Python <3.12.0a1,>=3.11; 0.1.125 Requires-Python <3.12.0a1,>=3.11; 0.2.0 Requires-Python <3.12.0a1,>=3.11; 0.2.0.dev1 Requires-Python <3.12.0a1,>=3.11; 0.2.0.dev2 Requires-Python <3.12.0a1,>=3.11; 0.2.0.dev3 Requires-Python <3.12.0a1,>=3.11; 0.2.0.dev4 Requires-Python <3.12.0a1,>=3.11; 0.2.1 Requires-Python <3.12.0a1,>=3.11; 0.2.2 Requires-Python <3.12.0a1,>=3.11; 0.2.3 Requires-Python <3.12.0a1,>=3.11; 0.2.4 Requires-Python <3.12.0a1,>=3.11; 0.2.5 Requires-Python <3.12.0a1,>=3.11; 0.3.0 Requires-Python <3.12.0a1,>=3.11; 0.3.1 Requires-Python <3.12.0a1,>=3.11; 0.3.10 Requires-Python <3.12.0a1,>=3.11; 0.3.12 Requires-Python <3.12.0a1,>=3.11; 0.3.13 Requires-Python <3.12.0a1,>=3.11; 0.3.14 Requires-Python <3.12.0a1,>=3.11; 0.3.15 Requires-Python <3.12.0a1,>=3.11; 0.3.16 Requires-Python <3.12.0a1,>=3.11; 0.3.17 Requires-Python <3.12.0a1,>=3.11; 0.3.17.dev1 Requires-Python <3.12.0a1,>=3.11; 0.3.17.dev2 Requires-Python <3.12.0a1,>=3.11; 0.3.17.dev3 Requires-Python <3.12.0a1,>=3.11; 0.3.17.dev4 Requires-Python <3.12.0a1,>=3.11; 0.3.17.dev5 Requires-Python <3.12.0a1,>=3.11; 0.3.17.dev6 Requires-Python <3.12.0a1,>=3.11; 0.3.18 Requires-Python <3.12.0a1,>=3.11; 0.3.19 Requires-Python <3.12.0a1,>=3.11; 0.3.2 Requires-Python <3.12.0a1,>=3.11; 0.3.20 Requires-Python <3.12.0a1,>=3.11; 0.3.21 Requires-Python <3.12.0a1,>=3.11; 0.3.22 Requires-Python <3.12.0a1,>=3.11; 0.3.23 Requires-Python <3.12.0a1,>=3.11; 0.3.24 Requires-Python <3.12.0a1,>=3.11; 0.3.25 Requires-Python <3.12.0a1,>=3.11; 0.3.26 Requires-Python <3.12.0a1,>=3.11; 0.3.27 Requires-Python <3.12.0a1,>=3.11; 0.3.27.dev1 Requires-Python <3.12.0a1,>=3.11; 0.3.27.dev2 Requires-Python <3.12.0a1,>=3.11; 0.3.27.dev3 Requires-Python <3.12.0a1,>=3.11; 0.3.28 Requires-Python <3.12.0a1,>=3.11; 0.3.29 Requires-Python <3.12.0a1,>=3.11; 0.3.3 Requires-Python <3.12.0a1,>=3.11; 0.3.30 Requires-Python <3.12.0a1,>=3.11; 0.3.30.dev1 Requires-Python <3.12.0a1,>=3.11; 0.3.30.dev2 Requires-Python <3.12.0a1,>=3.11; 0.3.31 Requires-Python <3.12.0a1,>=3.11; 0.3.31.dev1 Requires-Python <3.12.0a1,>=3.11; 0.3.32 Requires-Python <3.12.0a1,>=3.11; 0.3.33 Requires-Python <3.12.0a1,>=3.11; 0.3.33.dev1 Requires-Python <3.12.0a1,>=3.11; 0.3.34 Requires-Python <3.12.0a1,>=3.11; 0.3.35 Requires-Python <3.12.0a1,>=3.11; 0.3.4 Requires-Python <3.12.0a1,>=3.11; 0.3.5 Requires-Python <3.12.0a1,>=3.11; 0.3.6 Requires-Python <3.12.0a1,>=3.11; 0.3.7 Requires-Python <3.12.0a1,>=3.11; 0.3.8 Requires-Python <3.12.0a1,>=3.11; 0.3.9 Requires-Python <3.12.0a1,>=3.11
ERROR: Could not find a version that satisfies the requirement open-webui (from versions: none)

[notice] A new release of pip is available: 24.2 -> 24.3.1
[notice] To update, run: python.exe -m pip install --upgrade pip
ERROR: No matching distribution found for open-webui
どうやらまだ、python3.13に対応していない様子でしたので、python3.11をダウンロードし世界線を移動することにしました。
python3.11をインストール
pythonの公式ページ(Pythonのダウンロード)に、Airchiveが残っていたのでここから
python3.11.9
をダウンロードしました。
PATHを変更
コンパイラのインスタンスをPython313 → Python311に変更します。
※変更方法は過去記事の通り(たんすの狭間[pipが使えない時])
再起動
皆まで言うなですね。
# 再起動後の様子
C:\ > python -V
Python 3.11.9

C:\ > pip -V
pip 24.0 from C:\Users\****\AppData\Local\Programs\Python\Python311\Lib\site-packages\pip (python 3.11)
ちゃんと変わっています。
インストール再挑戦!!
再度インストールに挑戦したところ、途中まではよさげな雰囲気でしたが、次のようなエラーが発生し、インストールが完了できません。
C:\ > pip install open-webui
:
ERROR: Could not install packages due to an OSError: [Errno 2] No such file or directory: 'C:\\Users\\****\\AppData\\Local\\Packages\\PythonSoftwareFoundation.Python.3.11_qbz5n2kfra8p0\\LocalCache\\local-packages\\Python311\\site-packages\\transformers\\models\\deprecated\\trajectory_transformer\\convert_trajectory_transformer_original_pytorch_checkpoint_to_pytorch.py'
HINT: This error might have occurred since this system does not have Windows Long Path support enabled. You can find information on how to enable this at https://pip.pypa.io/warnings/enable-long-paths
調べてみたところ、PATHが長すぎるので、ロングパス名を使用できるように修正してとのこと。
WindowsのロングPATH対応
Windows11でロングPATHを使用するためには、レジストリを変更するのが一番簡単そうでしたので、次の修正を加えました。
①検索バーから「regedit」を検索し、レジストリエディタを起動
②次のパスに移動する
HKEY_LOCAL_MACHINE\SYSTEM\CurrentControlSet\Control\FileSystem
③「LongPathsEnabled」に値のデータ「1」を入れる
④再起動
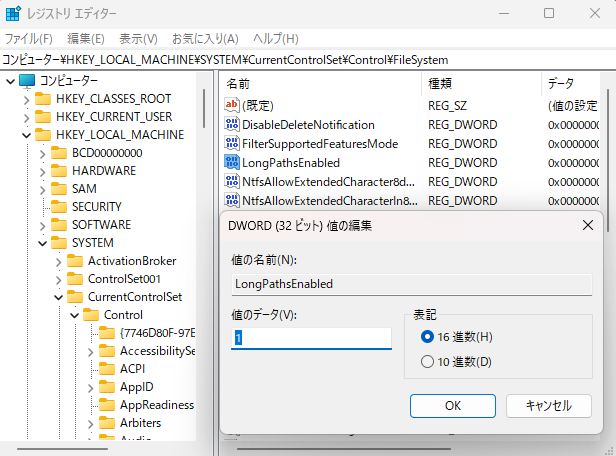
これでロングPATHに対応した ハズ!
インストール再挑戦!!
次のコマンドでWebUIのインストールを実行
C:\Users\keiai>pip install open-webui
Collecting open-webui
  Downloading open_webui-0.3.35-py3-none-any.whl.metadata (17 kB)
:
    Found existing installation: setuptools 65.5.0
    Uninstalling setuptools-65.5.0:
      Successfully uninstalled setuptools-65.5.0
Successfully installed

[notice] A new release of pip is available: 24.0 -> 24.3.1
[notice] To update, run: python.exe -m pip install --upgrade pip
やっとインストールが完了しました。
最後にはpipの新バージョンアルヨ…って。わざわざダウングレードしてインストールしていますので、アップグレードはしませんよ。
WebUIサーバの起動!
次のコマンドでサーバを起動させます。
C:\ > open-webui serve
:
INFO  [open_webui.env] Embedding model set: sentence-transformers/all-MiniLM-L6-v2
INFO  [open_webui.apps.audio.main] whisper_device_type: cpu
WARNI [langchain_community.utils.user_agent] USER_AGENT environment variable not set, consider setting it to identify your requests.

  ___                    __        __   _     _   _ ___
 / _ \ _ __   ___ _ __   \ \      / /__| |__ | | | |_ _|
| | | | '_ \ / _ \ '_ \   \ \ /\ / / _ \ '_ \| | | || |
| |_| | |_) |  __/ | | |   \ V  V /  __/ |_) | |_| || |
 \___/| .__/ \___|_| |_|    \_/\_/ \___|_.__/ \___/|___|
      |_|


v0.3.35 - building the best open-source AI user interface.

https://github.com/open-webui/open-webui
INFO:     Started server process [11192]
INFO:     Waiting for application startup.
INFO:     Application startup complete.
INFO:     Uvicorn running on http://0.0.0.0:8080 (Press CTRL+C to quit)
動きました。
そして、WindowsDefenderが、サーバの起動を察知したようで、ファイヤーウォールの確認です。
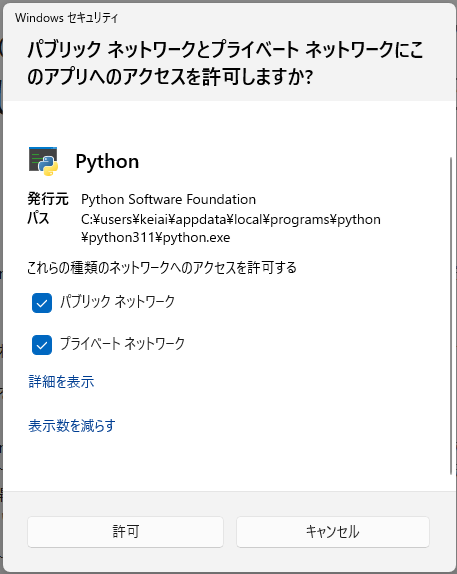
ローカル環境ですので、こんな感じでチェックを入れてOKを押しました。
ここでDefenderが確認してくれるのはありがたいですね。以前はここからソフトウェアファイヤウォールの設定をさがして、つながらない原因を探していましたw
WebUIへの接続
接続テスト
ローカルホストの8080番ポートを使用するようですので、
http://localhost:8080/
にアクセスすると次のページが表示されました。
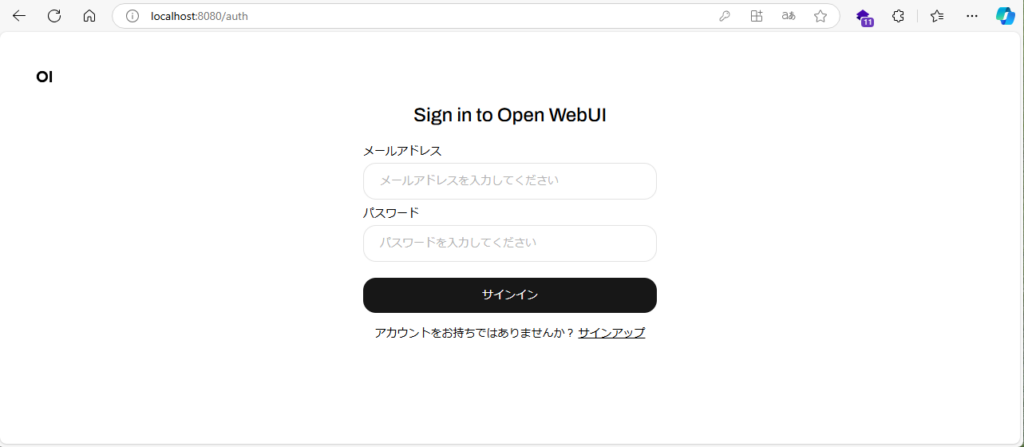
いきなりログイン画面ですと!?
とりあえずサインアップから。
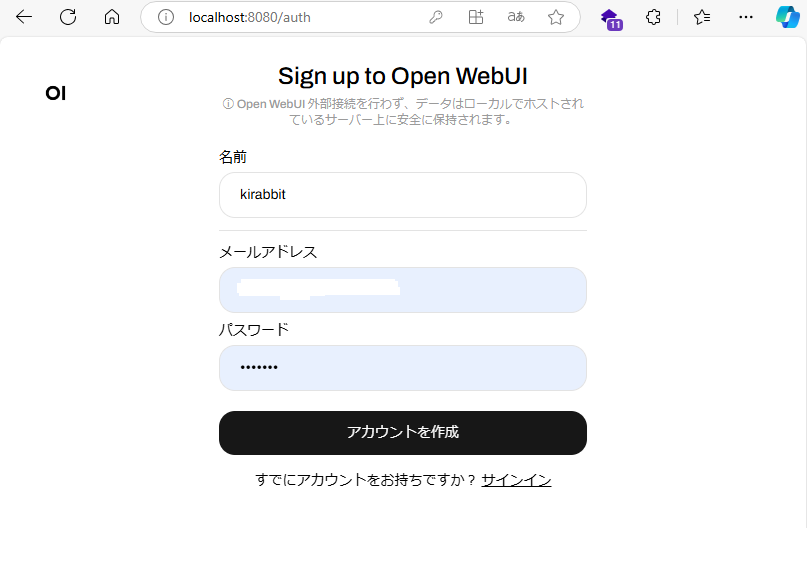
メールアドレスと適当なパスワードを入力しました。
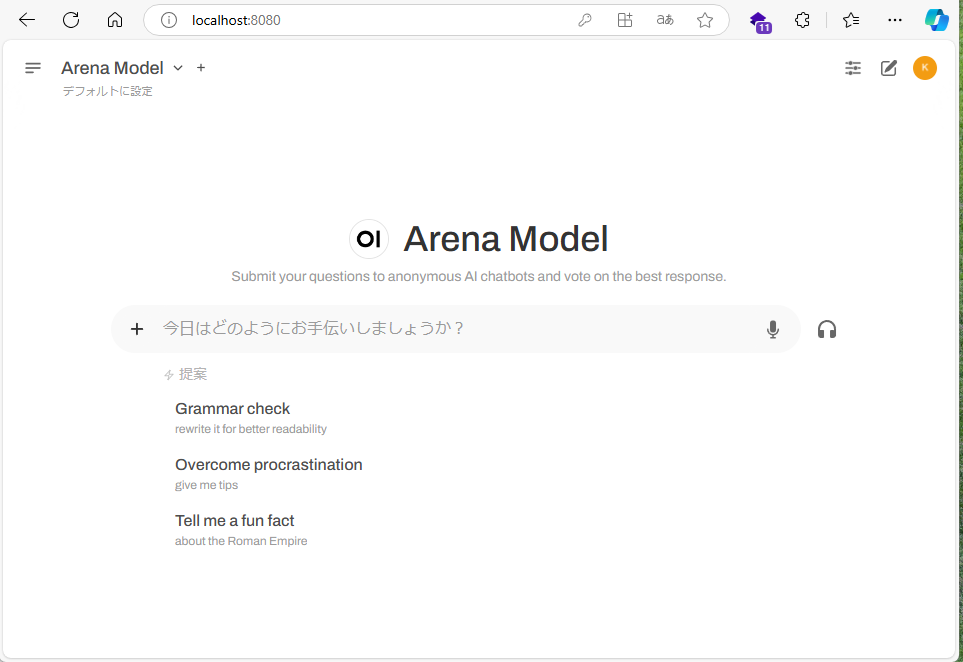
OpenAIライクな画面が。
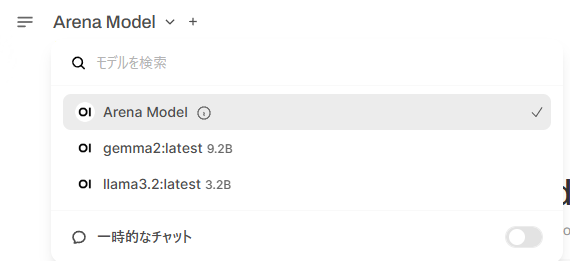
ollamaで実験に使っていた、modelもそのまま使えそうです。
簡単な質問をしたところ、ちゃんと回答してくれました。
ユーザの追加
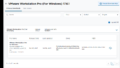
別のユーザ(chromeブラウザ)を使ってWebUIにログインしたところ次のように表示されます。
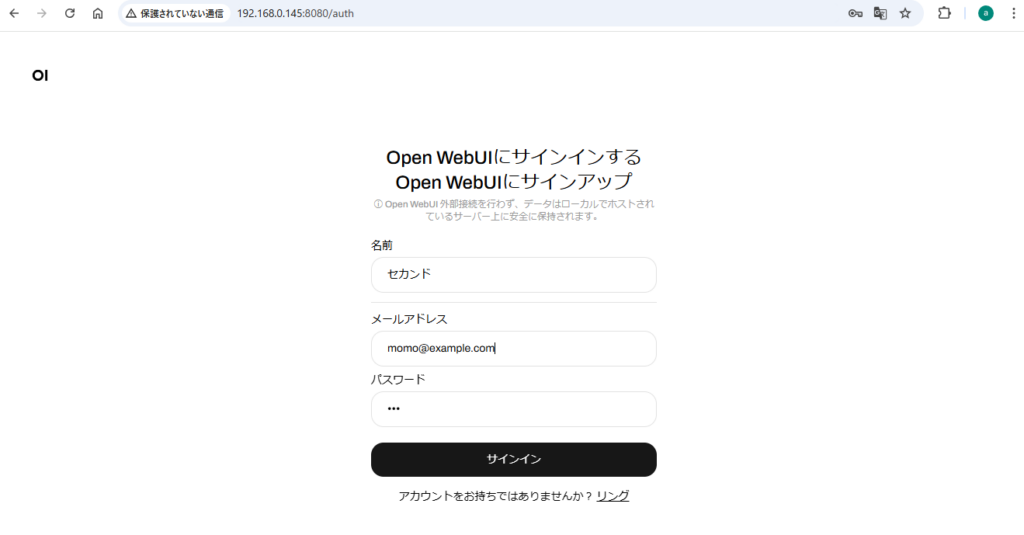
適当なユーザ名と、適当なメールアドレス(メールの受信確認はしていないので、アドレス形式の文字列を入れれば良し)を入力してサインイン
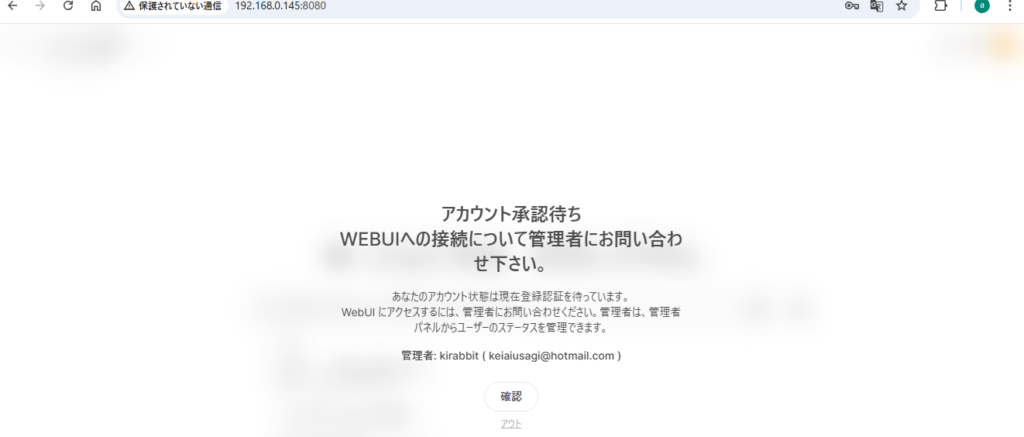
アカウントの承認待ちになります。
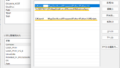
最初に登録したユーザでログインして、右上のアイコンから管理者パネルを開くと
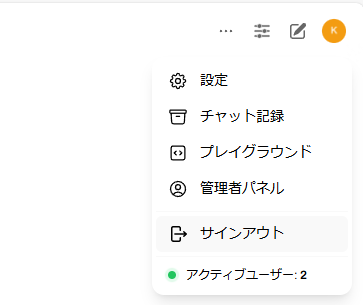
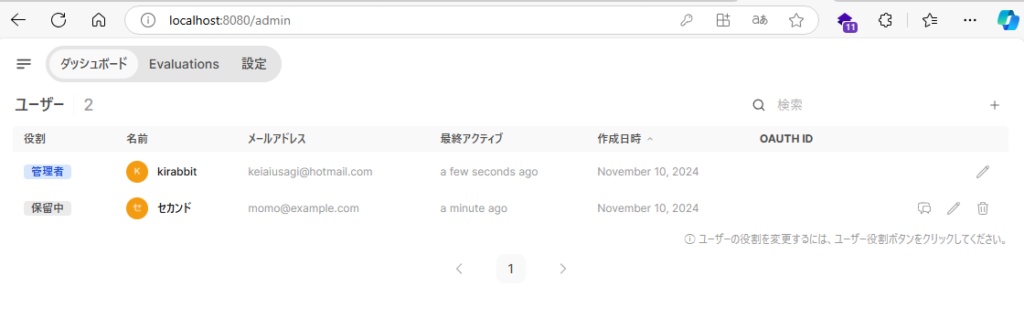
保留中の「セカンド」さんがいました。
「保留中」アイコンをクリックすると、保留→ユーザ→管理者 となっていきます。
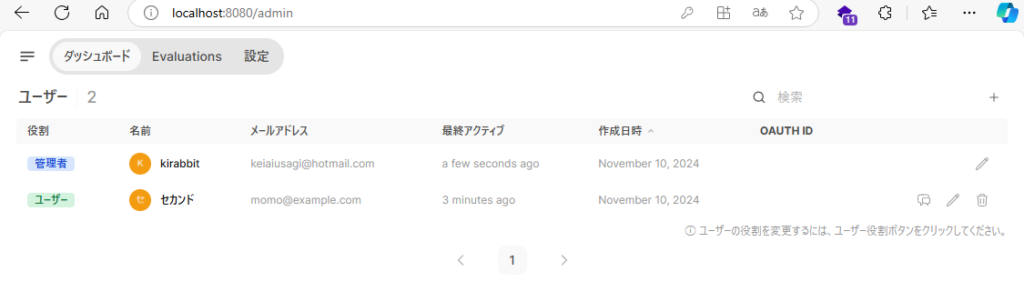
これで「セカンド」さんもサインアップが承認されて、ログインできるようになりました。
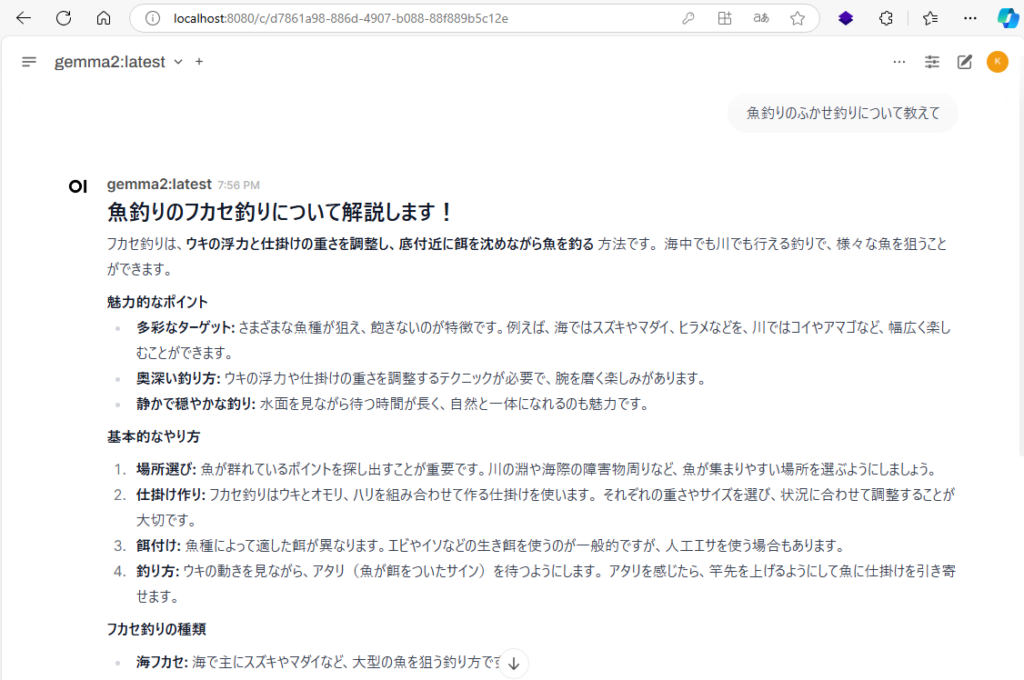
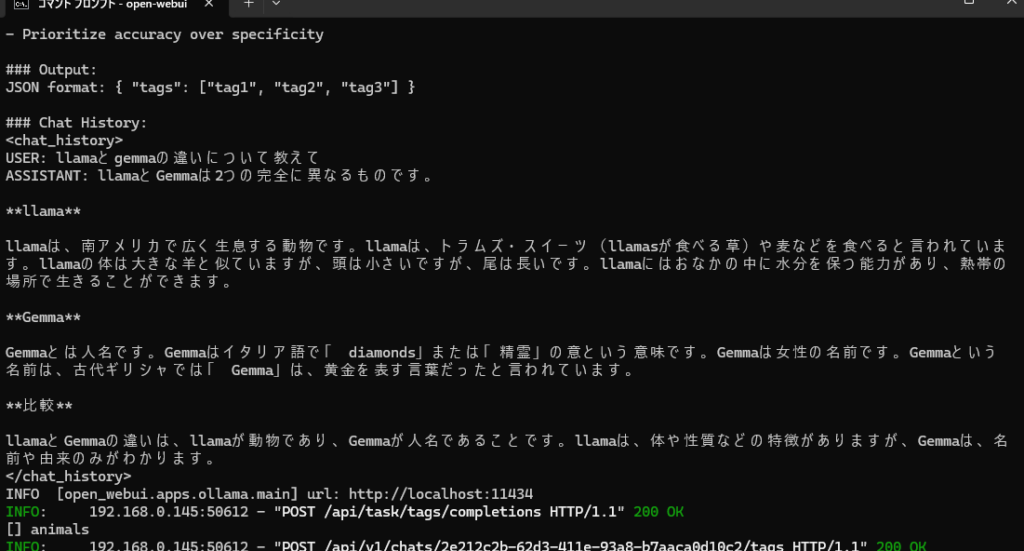
セカンドさんは、llama3.2モデルを使って、
「llamaとgemmaの違いについて教えて」
と質問したところ、意味不明な回答が…
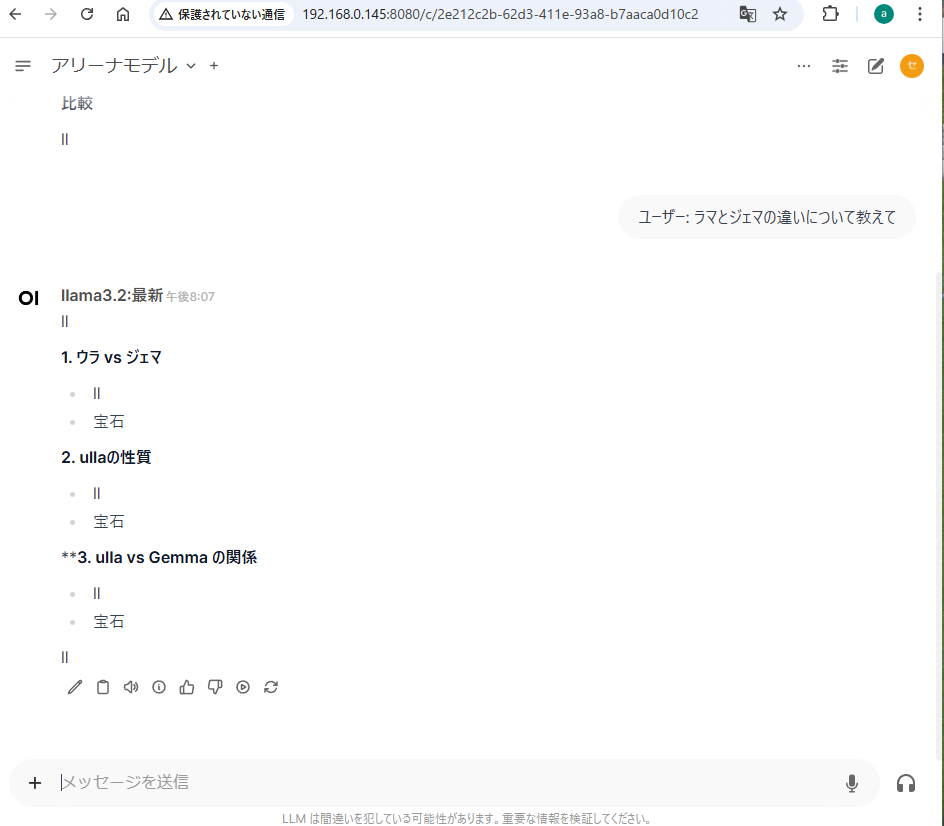
コマンドプロンプト上では質問も回答も記録されているところを見るとchromeブラウザだと、回答がおかしくなるようです。
ユーザを変えて実験しましたが、WebUIはchromeブラウザに対応していない様子です。
最後に
WebUI面白いですね。
私の環境でも、複数ユーザ(テストは二人)からリクエストを受けてもちゃんと回答が返ってきます。
OpenAIのChatGPTには遠く及びませんが、無料トークンを使い果たした時に良い相談相手になってくれそうです。
家庭内LAN環境なら、ローカルLLMとして十分使える性能だと思います。
WebUIにはファイルのアップロード機能もありますが、私が実験したgemma2やllama3.2などのmodelでは、画像を使った質問はできませんでした。
マルチモーダルに対応したmodelを使用した場合の挙動については、また今度やってみます。
Dockerを使った環境構築もやってみたのですが、本当に簡単すぎて、記事にならないと思いDockerを使用しない方法の記事を書きました。