PCの入れ替えに伴いVM上のUbuntuに、①Apache install ②PHPモジュールinstall、③SSH install をしたので備忘録として残しておきます。
環境
メインPC Windows11 Home
VM VMware Workstation Pro 17.6.1 ※無料で使えます
ゲストOS Ubuntu24.04.1 LTS noble
目標
今回は、とりあえずApacheが使えるところまでを目標にします。
①Apacheのインストール
②ApacheでPHPを動作させる
③SSHの設定
経過
⓪ 準備編
次のコマンドで、APTを最新バージョンに引き上げます。
$ > sudo apt update
:
パッケージリストを読み込んでいます... 完了
依存関係ツリーを作成しています... 完了
状態情報を読み取っています... 完了
アップグレードできるパッケージが 31 個あります。表示するには 'apt list --upgradable' を実行してください。
# まだプロジェクトがないので、全部を更新します
$ > sudo apt upgrade
:
ld by process 4177 (unattended-upgr)
パッケージリストを読み込んでいます... 0%                                        パッケージリストを読み込んでいます... 完了
依存関係ツリーを作成しています... 完了
状態情報を読み取っています... 完了
アップグレードパッケージを検出しています... 完了
ここまではおまじないです。
①Apacheのインストール
次のコマンドでapacheをインストールします。
$ > sudo apt install apache2
パッケージリストを読み込んでいます... 完了
依存関係ツリーを作成しています... 完了
状態情報を読み取っています... 完了
:
$ > apache2 -v
Server version: Apache/2.4.58 (Ubuntu)
Server built:   2024-10-02T12:40:51
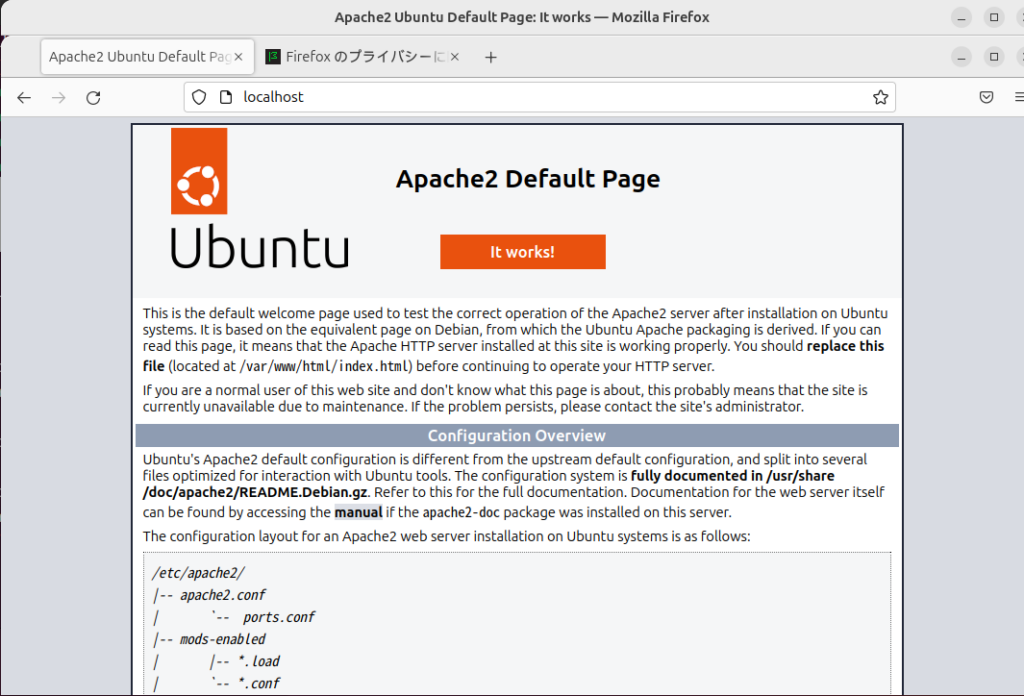
ブラウザから「http://localhost」のアクセスするとこんな感じのホーム画面が表示され、Apacheが動作していることがわかります。

# apacheの管理コマンド
●停止
$ > sudo apachectl stop apache2

●起動、再起動
$ > sudo systemctl start apache2
$ > sudo systemctl restart apache2

●状態確認
$ > systemctl ststus apache2
  apache2.service - The Apache HTTP Server
     Loaded: loaded (/usr/lib/systemd/system/apache2.service; enabled; preset: >
     Active: active (running) since Thu 2024-12-12 23:15:02 JST; 1min 11s ago
       Docs: https://httpd.apache.org/docs/2.4/
    Process: 18151 ExecStart=/usr/sbin/apachectl start (code=exited, status=0/S>
   Main PID: 18154 (apache2)
      Tasks: 55 (limit: 4558)
     Memory: 5.3M (peak: 5.6M)
        CPU: 20ms
     CGroup: /system.slice/apache2.service
             ├─18154 /usr/sbin/apache2 -k start
             ├─18156 /usr/sbin/apache2 -k start
             └─18157 /usr/sbin/apache2 -k start
  # Active: active (running) になっていれば起動中
②ApacheでPHPを動作させる
次のコマンドでPHPモジュールをインストールします。
$ > sudo apt install php libapache2-mod-php
パッケージリストを読み込んでいます... 完了
依存関係ツリーを作成しています... 完了
状態情報を読み取っています... 完了
:

# php は既に入っていたのかな?
$ > php -v
PHP 8.3.6 (cli) (built: Sep 30 2024 15:17:17) (NTS)
Copyright (c) The PHP Group
Zend Engine v4.3.6, Copyright (c) Zend Technologies
    with Zend OPcache v8.3.6, Copyright (c), by Zend Technologies
次は、ApacheにPHPモジュールを登録します。
$ > sudo a2enmod php8.3
Considering dependency mpm_prefork for php8.3:
Considering conflict mpm_event for mpm_prefork:
Considering conflict mpm_worker for mpm_prefork:
Module mpm_prefork already enabled
Considering conflict php5 for php8.3:
Module php8.3 already enabled

# 設定ができたので、Apacheを再起動します
$ > sudo systemctl restart apache2
次はテストプログラムを配置します。
$ > cd /var/www/html/
/var/www/html$ > sudo nano test.php
test.phpの内容はこんな感じにしました。
<?php
phpinfo();
?>
nanoエディタでは、 Ctrl + S (保存)、Ctrl + X(終了)を忘れずに。
/var/www/html$ > ll
-rw-r--r-- 1 root root 10671 12月 12 23:07 index.html
-rw-r--r-- 1 root root    21 12月 12 23:38 test.php  # ←まだ実行権限がついていない

# sudo nanoで作成したファイルはパーミッションの変更にsudoが必要
/var/www/html$ > sudo chmod 755 test.php

/var/www/html$ > ll
-rw-r--r-- 1 root root 10671 12月 12 23:07 index.html
-rwxr-xr-x 1 root root    21 12月 12 23:38 test.php* # ←実行権限がついた
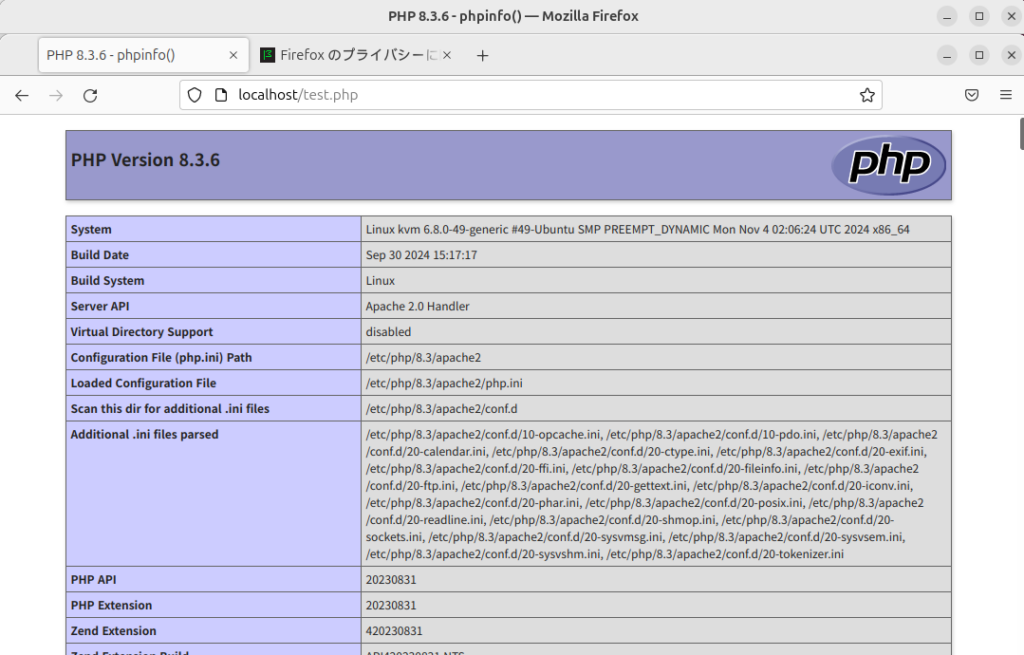
ブラウザから「http://localhost/test.php」を呼び出すとこんな感じです。

これでPHPも呼び出せるようになりました。
③SSH接続できるようにする
WindowsからVM上のUbuntuにSSHで接続させるために、UbuntuにSSHをインストールします。
$ > sudo apt install openssh-server
パッケージリストを読み込んでいます... 完了
依存関係ツリーを作成しています... 完了
状態情報を読み取っています... 完了
:

# バージョンを確認
$ > ssh -V          # ←Vは大文字
OpenSSH_9.6p1 Ubuntu-3ubuntu13.5, OpenSSL 3.0.13 30 Jan 2024

#インストール直後はサーバは起動していません
$ >  sudo systemctl status ssh
○ ssh.service - OpenBSD Secure Shell server
     Loaded: loaded (/usr/lib/systemd/system/ssh.service; disabled; preset: ena>
     Active: inactive (dead)
TriggeredBy: ● ssh.socket
       Docs: man:sshd(8)
             man:sshd_config(5)
lines 1-6/6 (END)

# 次のコマンドで有効にします
$ > sudo systemctl enable ssh
Synchronizing state of ssh.service with SysV service script with /usr/lib/systemd/systemd-sysv-install.
Executing: /usr/lib/systemd/systemd-sysv-install enable ssh
Created symlink /etc/systemd/system/sshd.service → /usr/lib/systemd/system/ssh.service.
Created symlink /etc/systemd/system/multi-user.target.wants/ssh.service → /usr/lib/systemd/system/ssh.service.
$ > sudo systemctl start ssh

# ステータスを確認すると起動していることが確認できる
$ > sudo systemctl status ssh
● ssh.service - OpenBSD Secure Shell server
     Loaded: loaded (/usr/lib/systemd/system/ssh.service; enabled; preset: enab>
     Active: active (running) since Thu 2024-12-12 23:55:45 JST; 8s ago # active (running)なら起動
TriggeredBy: ● ssh.socket
       Docs: man:sshd(8)

# サーバのIPアドレス確認
$ > hostname -I
192.168.254.128
Windows側からSSHサーバを呼び出す
WindowsのPowerShellから次のコマンドでubuntuのSSHサーバを呼び出します。
<windows powershell>
PS C:\> ssh kirabbit@192.168.254.128
The authenticity of host '192.168.254.128 (192.168.254.128)' can't be established.
ED25519 key fingerprint is SHA256:GhnU8x190CP0P4uCSziSHVdVy/0Er**********.
This key is not known by any other names.
Are you sure you want to continue connecting (yes/no/[fingerprint])?
yes
Warning: Permanently added '192.168.254.128' (ED25519) to the list of known hosts.
Connection closed by 192.168.254.128 port 22

# 初回接続時には、「この接続元のキーを信用しますか?」などと聞かれるので、「yes」と入力します。
PS C:\> ssh-keygen
Generating public/private ed25519 key pair.
Enter file in which to save the key (C:\Users\***/.ssh/id_ed25519):
Enter passphrase (empty for no passphrase): (何も入れずにエンター)
Enter same passphrase again:  (何も入れずにエンター)
Your identification has been saved in C:\Users\****/.ssh/id_ed25519
Your public key has been saved in C:\Users\****/.ssh/id_ed25519.pub
The key fingerprint is:
SHA256:heaglGB9ImWLNg+BHhj************** ****@*****
The key's randomart image is:
+--[ED25519 256]--+
|+o*oo            |
+----[SHA256]-----+

# 今回はローカル環境で作っていますので、パスワードは「なし」にしました
# パスワードを設定しなくても、秘密鍵と公開鍵での暗号化はされています
作成した公開鍵は、
C:\Users\ユーザ名.ssh\id_ed25519.pub
に出力されますのでメモ帳で開いて、この内容を記録しておいてください。
私の環境では、
”ssh-ed25519 AAAAC3NzaC1lZDI1NTE5AAAAIKreR+N4******************************
username@servername”
このような値ができていました。
次は、Ubuntu に戻って、この公開鍵を登録します。
<ubuntu>
# ホームディレクトリに公開鍵の保存フォルダを作り、鍵を登録します
$ cd ~
~$ mkdir -p ~/.ssh
~$ chmod 700 ~/.ssh
~$ echo "ssh-ed25519 AAAAC3NzaC1lZDI1NTE5AAAAIKreR+N4******************************
   username@servername" >> ~/.ssh/authorized_keys
~$ chmod 600 ~/.ssh/authorized_keys
これで、公開鍵が登録できました。
Windowsから次のコマンドでログインできれば成功です。
<windows>
PS C:\> ssh kirabbit@192.168.254.128       # ubuntのログインユーザ名@ubuntuのIP
Welcome to Ubuntu 24.04.1 LTS (GNU/Linux 6.8.0-49-generic x86_64)

 * Documentation:  https://help.ubuntu.com
 * Management:     https://landscape.canonical.com
 * Support:        https://ubuntu.com/pro

The programs included with the Ubuntu system are free software;
the exact distribution terms for each program are described in the
individual files in /usr/share/doc/*/copyright.

Ubuntu comes with ABSOLUTELY NO WARRANTY, to the extent permitted by
applicable law.

~$  pwd
/home/****

# パスワードがなくてもログインできていれば成功です。
終わりに
今回はApacheのインストールからSSHによるログインまでを書きました。
たまにしかやらないので、備忘録がないと忘れてしまうのです。
次回はもっと楽にできるといいなと思っています。


